This article explains the basics of using the rehearsal room at HQ.
First, locate the mixer in the rehearsal room (SCROLL DOWN FOR VIDEO TUTORIAL)
Next locate the cable that you need to plug in your microphone or instrument. We provide XLR cables which are stored on the pegboard directly behind the door. Instrument cables are not provided, you will need to bring these.
Microphone connections:
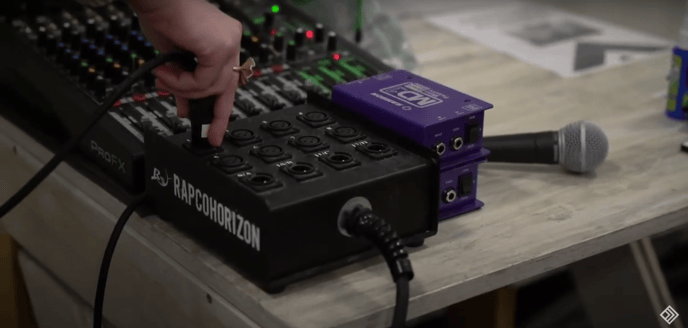
To connect your microphone, plug the correct end of the XLR cable into your microphone, and plug the other end into the snake. The snake is already connected to the mixer, and we ask that you do not plug directly into the mixer with xlr or instrument cables. Think of the snake as an extension cord, whenever you plug into Channel 1 on the snake, the signal is run to channel 1 on the mixer, same for channel 2, etc.
Instrument connections:
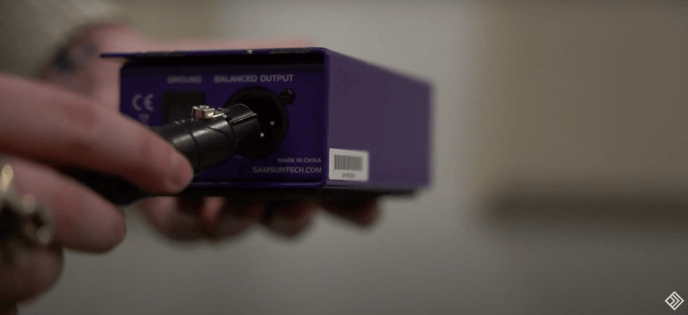
if you are plugging in an instrument such as a guitar or bass, you would locate or bring a DI box appropriate for that instrument, and connect an XLR cable from one end of the DI box to a channel on the snake, just like a microphone. From there, you would plug your instrument cable directly into the other side of the DI box.
if you are plugging in an instrument such as a guitar or bass, you would locate or bring a DI box appropriate for that instrument, and connect an XLR cable from one end of the DI box to a channel on the snake, just like a microphone. From there, you would plug your instrument cable directly into the other side of the DI box.

Please do not unplug any inputs from the mixer, or plug directly into the mixer. Please plug directly into the snake.
Note: If you are playing music from an audio device such as a cell phone or laptop, this is an exception to the floor box rule. Simply use an eighth inch cable and plug directly into the mixer.
Operating the mixer:
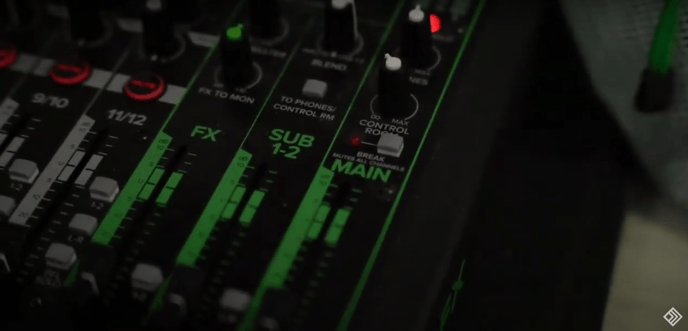
After your mics and instruments are plugged in, turn off the mute and adjust the volume for each channel. Do this one channel at a time to make sure you don't feedback from other instruments. There is also a "master fader" or main volume control on the far right hand side of the mixer called the "MAIN" that also has it's own master mute called "break". This mute button and fader will control the volume of all channels simultaneously. When finished with your session, please make sure to mute this channel using the "break" button.

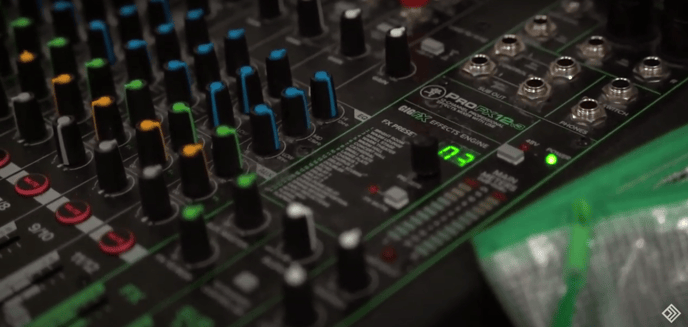
Some mixers include effects that you can send to your channels as well. To use these, first locate the effects controls (picture below) and unmute by clicking the grey button. Select the effect you want to use by scrolling the black wheel and pushing it in to select. Next, locate the FX knob in the channel you want to send the effect to, and simply rotate left to right depending on how strong you want the effects to be.

Please leave the rehearsal space in good condition, and on time, as a courtesy for the next member. This includes placing mics back inside the mic bag, removing any trash or debris you brought with you, and wrapping your cables before placing them neatly on the pegboard.

If your rehearsal space includes a practice drum kit, please remember we do not provide symbols sticks or small Hardware you would need to bring these for your session.
Remember, a full list of our guidelines can be found on your account page.
Remember: Failure to comply with our member guidelines and policies may result in a $40 service fee to the account responsible.

